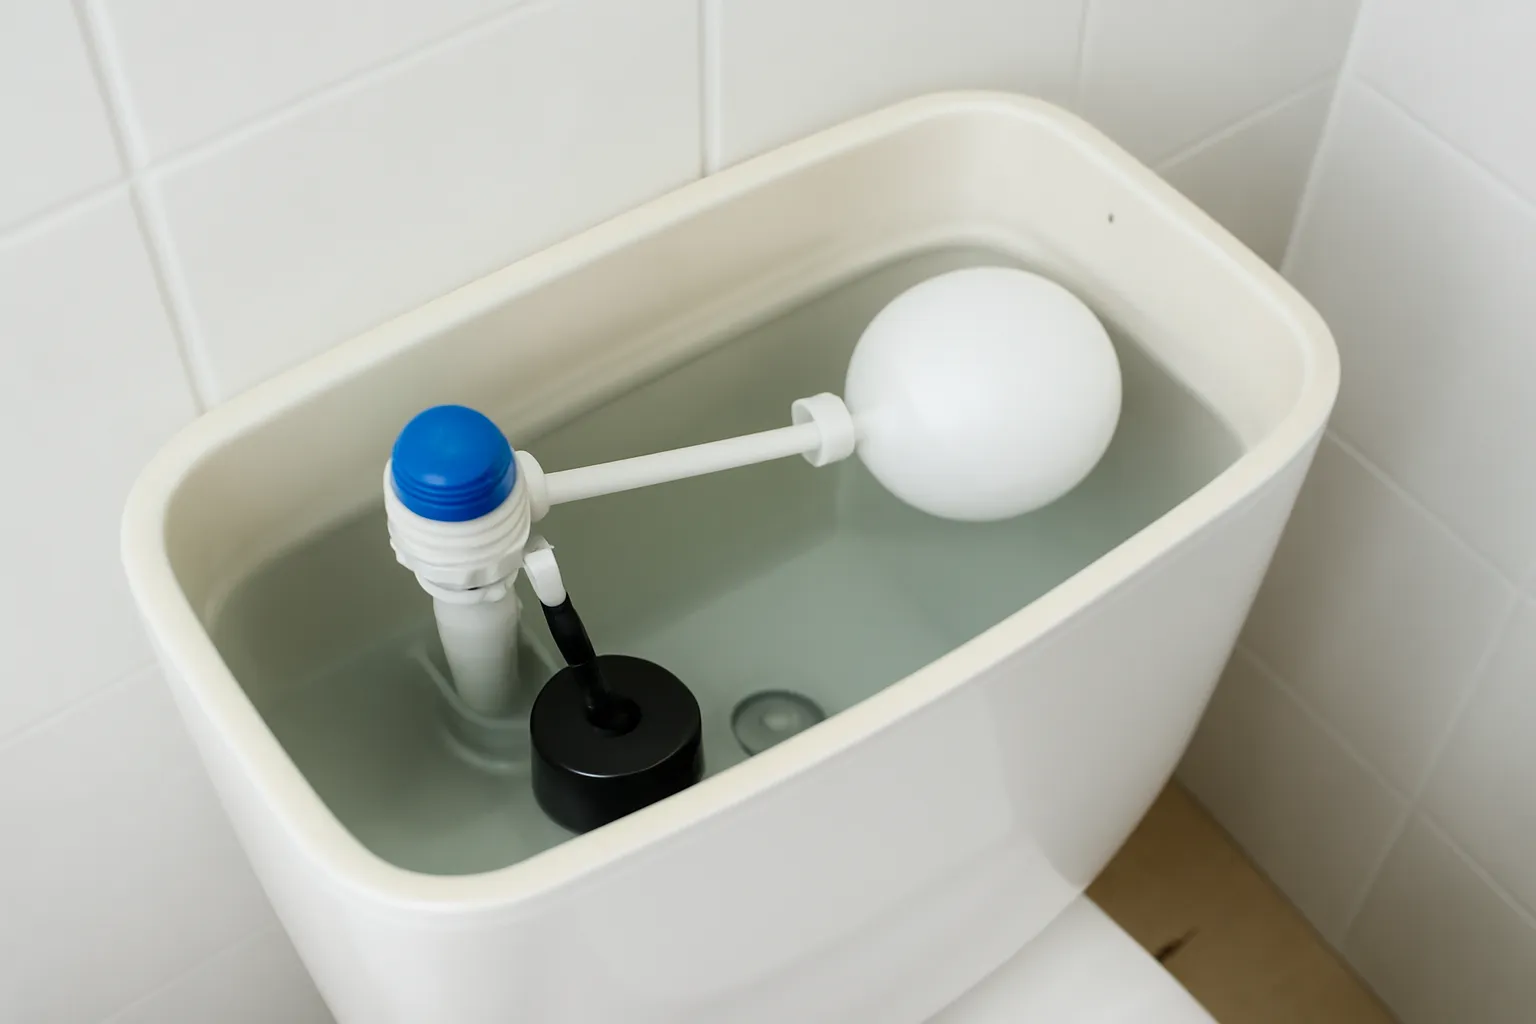
Clean Toilet Water Tank: Step-by-Step Guide to a Cleaner Flush
Maintaining a clean toilet water tank—also known as the cistern or flush tank in some regions—helps ensure a reliable, better-performing flush and reduces the buildup of minerals, slime, and unpleasant odors. This guide provides a comprehensive, practical approach to cleaning the interior and exterior of the toilet tank, along with maintenance tips that keep your bathroom sanitary and your plumbing running smoothly. Whether you call it the toilet cistern or the flush tank, the goal remains the same: a thorough, safe cleaning that promotes a strong flush and minimizes clogs and leaks over time.
Why clean the toilet water tank?
The practice of cleaning the toilet tank derives from the fact that mineral deposits, algae, and sediment can accumulate on the interior surfaces and on mechanical parts such as the fill valve, float, and flush valve. Over time, these deposits can hinder how quickly the tank refills, affect the seal of the flapper, and contribute to a weaker flush. A routine cleaning routine:
Improves flushing performance and reduces the chance of partial flushes.
Prevents mineral buildup that can harden on the rims of the tank and the valve assembly.
Extends the life of rubber seals and moving parts by limiting exposure to hard water.
Reduces odors associated with standing water and organic matter in the tank.
Before beginning, recognize that the tank is part of the toilet’s water supply line, and maintenance should be performed with care. The exact configuration varies by model and region, but the basic concepts apply across common configurations found in homes around the world.
What you need to begin: supplies and safety
Gather the items you will need for a safe, effective cleaning. Having everything on hand before you start minimizes water spills and interruptions to your bathroom routine. Below is a practical list of supplies:
Protective gloves and, if desired, safety glasses to prevent splashes from cleaning agents.
Non-abrasive scrub brush or a soft-bristled brush for interior tank surfaces.
White distilled vinegar and/or baking soda as natural cleaning agents.
Clean water for diluting cleaning solutions and rinsing components.
Old towels or rags for absorbing spills and drying surfaces.
Bucket for collecting water during the process.
A small sponge or cloth for wiping down exterior surfaces and around the lid.
Optional: commercial toilet tank cleaner designed for use in cisterns, following the manufacturer’s instructions.
Important safety notes:
Avoid mixing bleach with ammonia or other cleaners as this can produce dangerous gases. If you choose to use bleach, use it sparingly and only with clear guidance from the product label and your tank’s materials compatibility.
Turn off the water supply to the toilet before you begin to prevent refilling while you clean (usually a valve near the floor behind the toilet).
Never submerge electronic components found in some modern toilets, and be cautious not to damage rubber seals or the flush valve.
Safety and preparation: getting ready for a clean tank
Understanding your toilet’s configuration
Most toilets have a flush valve at the bottom of the tank connected to the bowl, and a fill valve that refills the tank after a flush. The float mechanism helps control the fill level. Knowing where these parts live helps you avoid accidentally displacing or damaging essential components during cleaning.
Shutting down water flow and draining the tank
Turn the water supply valve clockwise until it stops to shut off incoming water.
Flush the toilet to remove as much water as possible from the tank and bowl.
Use a sponge or towel to soak up remaining water inside the tank and set it aside in the bucket. This step makes the interior surfaces drier and easier to clean.
Method A: Vinegar-based cleaning for a cleaner flush
The following approach uses a vinegar-based solution to dissolve mineral deposits, lime scale, and mineral-based grime without harsh chemicals. Vinegar is safe for most plastic tank interiors when used in moderate concentrations and allowed to soak briefly.
Step-by-step procedure
Prepare the cleaning solution: Mix 1 part white distilled vinegar to 1 part water in a clean container. For a stronger descaling effect, you can use a higher ratio of vinegar, but avoid applying undiluted vinegar directly to rubber seals for long periods.
Apply the solution to interior surfaces: Use a sponge or cloth to wipe the exterior of the tank and reach the interior surfaces as much as possible through the overflow tube opening or any accessible areas. For hard-to-reach corners, you can pour the solution into the tank and let it sit for a while.
Allow soaking time: Let the vinegar solution sit for 15–30 minutes on mineral deposits. Do not leave the solution on rubber parts for extended periods; rinse promptly if you notice any adverse effects.
Scrub gently: Use a non-abrasive brush to scrub interior walls, the float arm, and the edges of the flush valve stem. Be careful not to dislodge seals or cause scratches on plastic surfaces.
Rinse thoroughly: Refill the tank with clean water (or allow it to fill normally if you have restored the water supply) and flush a couple of times to remove vinegar residue and loosened deposits.
Dry and inspect: Wipe dry with a towel and visually inspect the interior for remaining buildup. If necessary, repeat the process or proceed to a second method for particularly stubborn deposits.
Why the vinegar method works
Vinegar is acidic, which helps dissolve calcium and limescale buildup in areas affected by hard water. It’s a mild, inexpensive option that minimizes risk to most plastics and rubber components when used in moderation. The vinegar approach is also environmentally friendly and easy to rinse away, reducing the chance of lingering odors after cleaning.
Method B: Baking soda and water cleaning for deodorizing and gentler scale removal
A baking soda-based cleaning approach provides a gentle yet effective way to scrub away surface grime, deodorize the tank, and reduce mild mineral buildup without the acidity of vinegar. This method is popular for households that prefer a mild cleaning regime.
Step-by-step procedure
Prepare a baking soda slurry: In a small bowl, mix baking soda with water until you obtain a thick paste. Alternatively, you can sprinkle baking soda directly onto damp surfaces and scrub in.
Spread the paste: Using a cloth or brush, apply the baking soda paste to the interior walls of the tank, focusing on mineral-streaked areas and corners where sediment tends to accumulate.
Let it sit briefly: Allow the paste to sit for about 10–15 minutes. Baking soda helps to lift grime and neutralize odors without harsh chemicals.
Scrub and rinse: Scrub the interior with a non-abrasive brush, then rinse by filling the tank with clean water and flushing several times to carry away loosened deposits.
Examine the flush valve and seals: While cleaning, inspect the flush valve and rubber seals for wear. Replace any worn components as needed to maintain a strong, reliable flush.
When to choose baking soda
Baking soda is particularly useful for light to moderate buildup and when you want a fragrance-neutral cleaning routine. It’s safe for most plastic surfaces and rubber parts, though you should still avoid using abrasive tools that could scratch the tank’s interior.
Descaling for stubborn mineral deposits: a targeted approach
Some homes experience significant hard water scale buildup inside toilets. If you encounter stubborn deposits that resist standard cleaning methods, you can employ a targeted descaling technique using mild acid solutions or descaling products designed for toilets. Always follow product directions and test on a small area when possible.
Gentle descaling steps
Mix a mild descaling solution according to product directions or use a diluted vinegar solution as described in Method A.
Apply the solution to mineral-rich areas using a cloth or soft brush, focusing on areas where deposits are most visible.
Let the solution sit briefly (as recommended), then scrub with a soft brush and rinse thoroughly with clean water.
Flush the tank several times to remove loosened deposits and ensure the system functions correctly.
Cleaning exterior components and accessibility
In addition to cleaning the interior surfaces, you should keep the tank’s exterior clean and visually inspect components for wear. This helps you detect issues before they become leaks or failures. Key exterior tasks include:
Wiping the exterior with a damp cloth to remove dust, moisture, and splash marks from the tank lid and sides.
Inspecting the lid seal around the tank opening to ensure it sits snugly and does not allow odors to escape.
Checking the flush mechanism for smooth operation when you flush by hand with the lid off (do not force components; proceed gently).
Cleaning around the overflow tube to ensure there is no blockage and the water can flow freely during a flush.
Maintenance and preventive care for a consistently clean flush
Preventive maintenance is the best way to keep your toilet water tank clean with minimal effort over time. Implementing a simple routine can reduce buildup and preserve the efficiency of the flush mechanism.
Establishing a cleaning cadence
Depending on your water quality and usage, you might adopt one of the following cadences:
Every 6–12 months: A thorough interior clean using vinegar or baking soda.
Every 3–6 months: A lighter exterior cleaning and quick inspection of seals and valves.
After any plumbing changes or after a high-use season (for households with frequent guests or heavy bathroom use).
Tips for maintaining a clean tank between deep cleans
Run a cleaning cycle with a small amount of antibacterial toilet cleaner in the tank only if the product’s label supports tank use; otherwise, rely on vinegar or baking soda for routine cleaning.
Regularly flush the toilet to prevent stagnation and reduce odors.
Use water-softeners in homes with exceptionally hard water to reduce mineral buildup over time.
Maintenance checklist: quick-reference steps
Shut off the water supply and drain the tank by flushing.
Inspect interior components (flush valve, fill valve, flapper) for wear.
Choose a cleaning method (vinegar-based or baking soda-based) and prepare the solution.
Clean interior surfaces with a non-abrasive brush, then rinse.
Clean exterior surfaces and inspect the lid seal.
Turn the water back on and flush several times to ensure a proper refill and performance.
Record observations about any leaks or irregular flushing to address later.
Common problems and troubleshooting
Even with a careful cleaning routine, you might encounter issues that affect your toilet’s performance. Here are some typical problems and practical fixes:
Weak flush after cleaning: Check the flapper seal and the fill valve. Debris can prevent a full seal; clean or replace worn parts as needed.
Constant running water: A damaged flapper or a faulty fill valve can cause continuous flow. Replace the affected component and test.
Tank not refilling properly: Inspect the float and the fill valve adjustment. Adjust the float height according to the manufacturer’s guidelines.
Persistent odor: Clean the interior surfaces thoroughly; consider a light application of vinegar or baking soda and ensure the seal around the lid is intact to prevent odor leakage.
Environmental and health considerations
Cleaning the toilet water tank involves handling water that has been exposed to household waste in a controlled environment. While the risk is generally low when using common household cleaners in reasonable quantities, it is wise to:
Ventilate the bathroom during cleaning to minimize exposure to cleaning fumes.
Wear gloves to protect skin from cleaning agents and avoid contact with the eyes.
Dispose of used solutions safely in accordance with local regulations and do not mix cleaning agents in the drain.
Frequently asked questions about clean toilet water tanks
Can I use bleach in the toilet tank? Some manufacturers allow small amounts of bleach, but many advise against it because bleach can degrade rubber seals and corrode metal components over time. If you choose to use bleach, follow the product instructions and consider consulting your toilet’s manual or a plumber before proceeding.
Is vinegar safe for toilet tanks? Yes, vinegar is generally safe for plastic tanks and metal components when used in moderate concentrations and rinsed thoroughly after soaking. It’s a popular choice for regular maintenance due to its effectiveness and safety profile.
How often should I clean the toilet tank? This depends on water quality and usage; typical guidance suggests every 6–12 months for a deep interior cleaning, plus periodic exterior cleaning and component checks every few months.
Will cleaning damage the tank? If you use non-abrasive tools and follow the manufacturer’s guidance for your specific toilet model, cleaning should not damage the tank. Avoid metal scrapers and harsh chemicals that can scratch surfaces or degrade seals.
What if I have a toilet with an epoxy-coated tank? Epoxy coatings add a protective layer that can be damaged by aggressive cleaners. Stick to mild cleaners and follow coating-specific maintenance recommendations from the manufacturer.
Conclusion: a cleaner flush starts with a clean tank
A well-maintained toilet water tank contributes to a more reliable flush, reduced mineral buildup, and a fresher bathroom environment. By following the step-by-step approaches outlined in this guide—whether you prefer a vinegar-based routine, a baking soda method, or a targeted descaling technique—you can maintain the interior and exterior of your toilet cistern or flush tank in good condition. Remember to prioritize safety, use gentle tools, and respect the specific components of your fixture. With thoughtful maintenance, you’ll enjoy a cleaner flush, less frequent repairs, and longer-lasting toilet performance for years to come.
Glossary of terms to help you navigate toilet tank maintenance
Toilet tank (United States) or cistern (UK/other regions): the container located above the toilet bowl that houses the flush mechanism and water used for flushing.
Flush valve: the valve at the bottom of the tank that releases water into the bowl when you flush.
Fill valve: the valve that refills the tank after a flush.
Flapper: a rubber seal at the flush valve that lifts to release water during a flush and then seals to stop the flow.
Float: the part that rises with the water level to shut off the fill valve when the tank is full.
Mineral buildup or scale: deposits left by hard water, typically calcium and magnesium salts.